ODE-Designer
ODE-Designer was developed in the context of a FAPEMIG research project by postgraduate students and undergraduate students in Computer Science at the Federal University of São João Del-Rei.
The main objective of ODE-Designer is to facilitate the creation, implementation and simulation of Ordinary Differential Equation (ODE) models. The software can be applied to research and teaching-learning of Computational Modeling.
Through a visually intuitive graphical user interface (GUI), ODE-Designer allows users to conceptualize and "draw" mathematical models, while the software automatically generates the requisite implementation, simulation, and result visualization code. A distinguished feature of the software is the model's visual representation. It is designed to be intuitive and easy to use.
ODE Designer
Installation
It is recommended to use the executables available in Releases on GitHub. This link can be used to always redirect to the latest version.
Linux
The Linux distribution uses AppImages, which requires a runtime (fuse2) installable on all Linux-based distributions. It is commonly included by default by some distributions, or is already installed by another program.
[!NOTE] Although AppImages can make binaries super portable in Linux, there's still a hard dependency on your system's GLIBC, which cannot be redistributed. As it stands, the minimum supported version is 2.28. You can check your system's version with this command:
ldd --versionIf your system meets this requirement, but you still get errors related to GLIBC, please open an issue and we'll look into it.
🐧 For Debian/Ubuntu/Pop_OS!/ElementaryOS
$ sudo apt install libfuse2
🐧 For ArchLinux
$ sudo pacman -S fuse2
Windows
The Windows distribution consists of a ZIP that can be extracted and its contents executed.
Compilation
Using Docker
You can use the provided Dockerfile to build your own AppImage with no build tools installed directly on your system. Simply run:
$ docker build -t ode-designer-appimage-builder --output=. .
After this execution, the AppImage should be available in ./ode-designer.AppImage. This AppImage, as well as those found in Releases, include Python and the scipy and matplotlib dependencies for code generation, interactive simulation and PDF export.
Manually
To compile and run the software outside of the AppImage, the Rust toolchain (nightly version) is required, as well as Python >= 3.11, and the dependencies listed in requirements.txt. Fulfilling these requirements, simply compile like any Rust project, running
$ cargo run
Or
$ cargo build --release
$ ./target/release/ode-designer-rs
If anything goes wrong, try
$ git submodule update --init --recursive
$ git submodule update --recursive --remote
Then, recompile and run.
Functionalities
Node-based editor
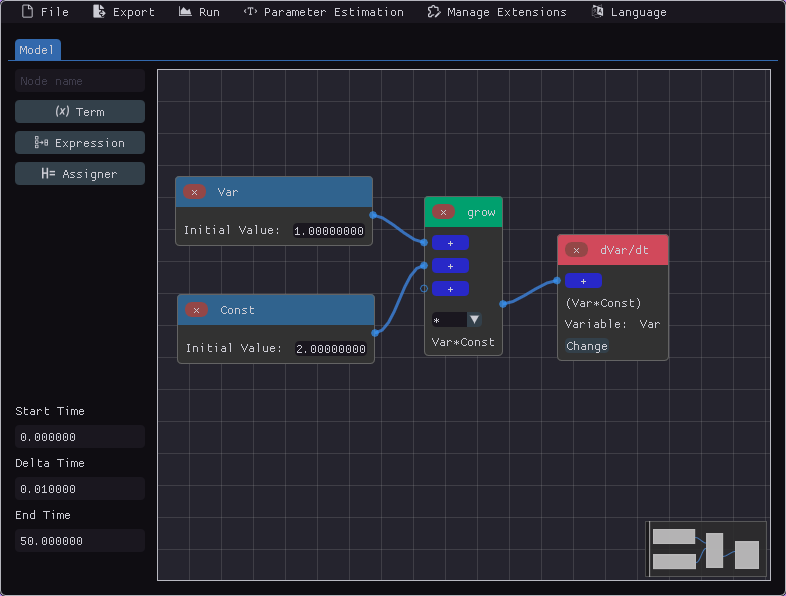
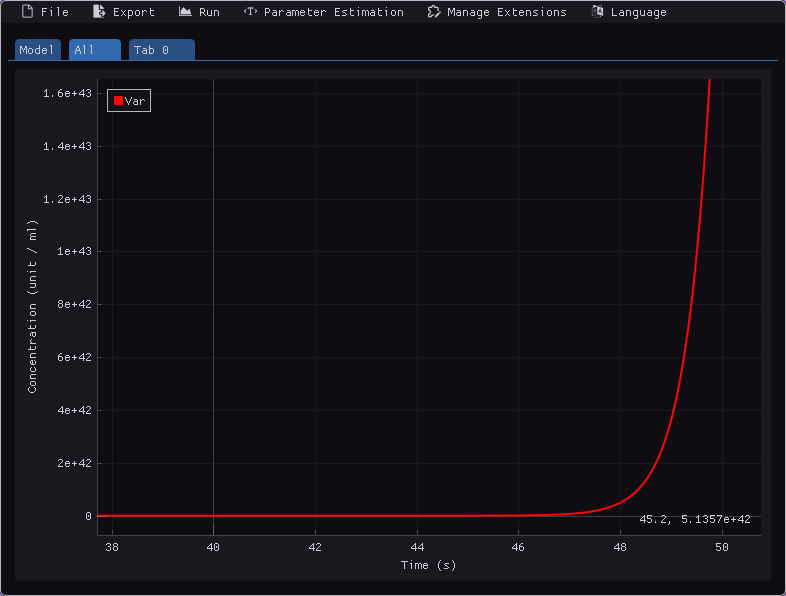
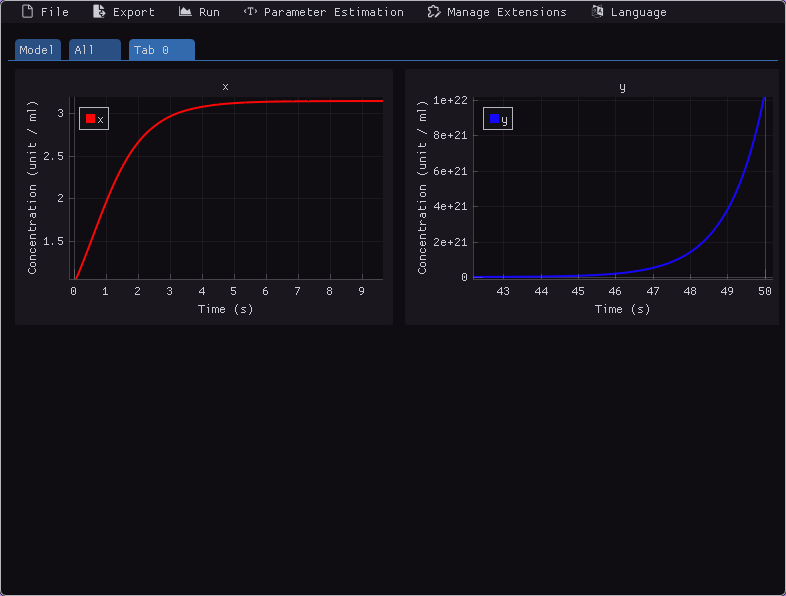
Plotting
Python code export and pdf export
# imports of scipy and numpy omitted

def initial_values() -> np.ndarray:
    Var_0 = 1.0
    return np.array((Var_0,))


def constants() -> list:
    Const = 2.0
    return [Const]


def variable_names() -> list[str]:
    return ["Var"]


def system(t: np.float64, y: np.ndarray, *constants) -> np.ndarray:
    Var, = y
    Const, = constants

    dVar_dt = Var*Const

    return np.array([dVar_dt])

# Rest of the code used to simulate and plot to PDF omitted
Extensibility via Python code
Given the following Python code:
import math

@node
def sine(x):
    return math.sin(x)


@node(format="$1 ^ $2")
def power(x, y):
    return x ** y
By importing it in the Manage Extensions menu, you can use the defined nodes as if they were native, as in the image below.
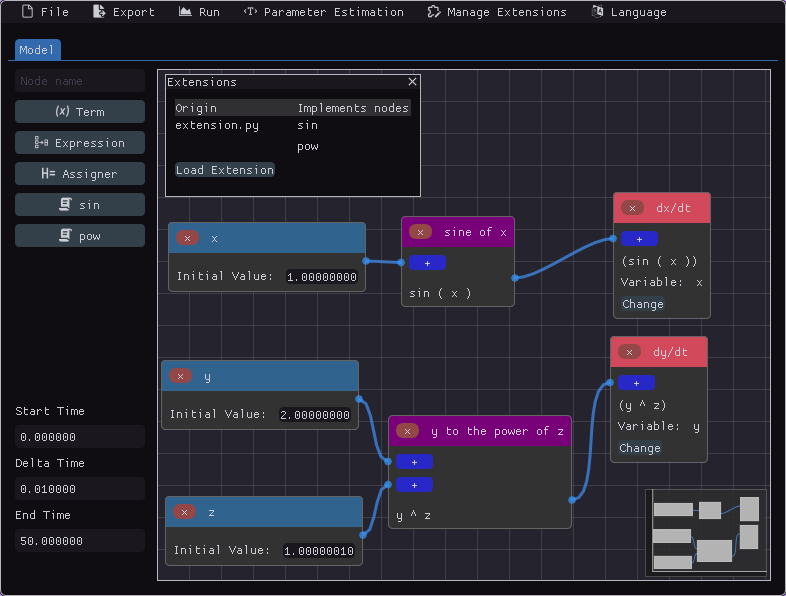
The code can be used to simulate just like native nodes.
Runnig an example
- To run an example, first go to the official repository ode-designer-rs;
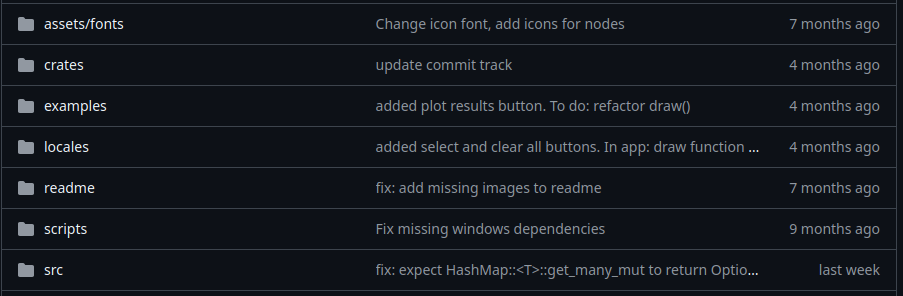
- Inside the repository, open the examples directory, where you'll find several
.jsonfiles.
- Choose one example to run and download it. Afterward, open the software.
-
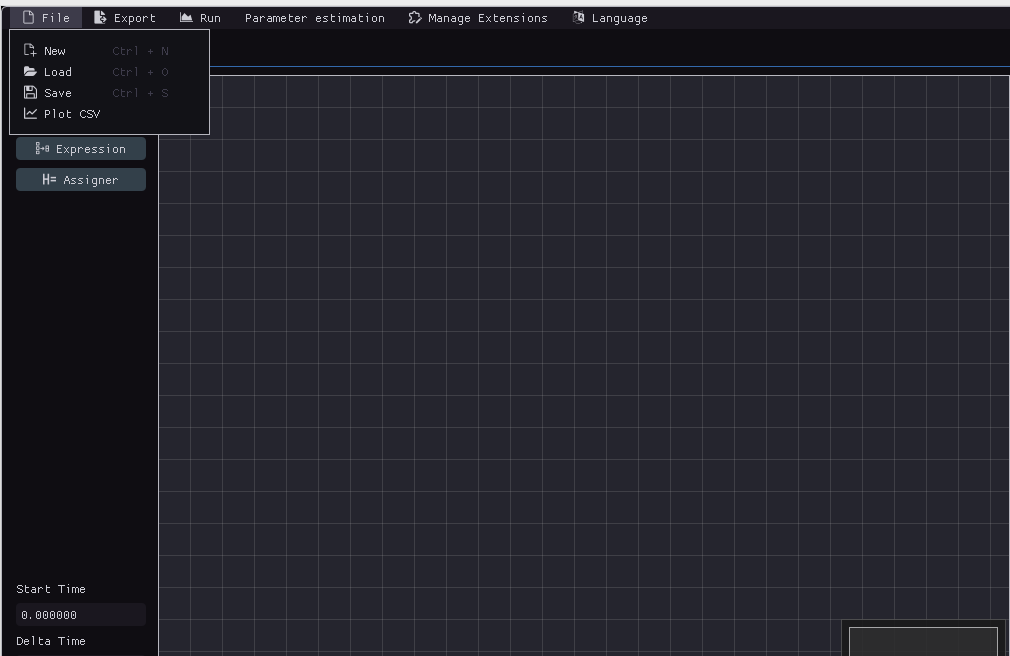
In the software, click on the File option in the top menu. When the dropdown appears, select Load.
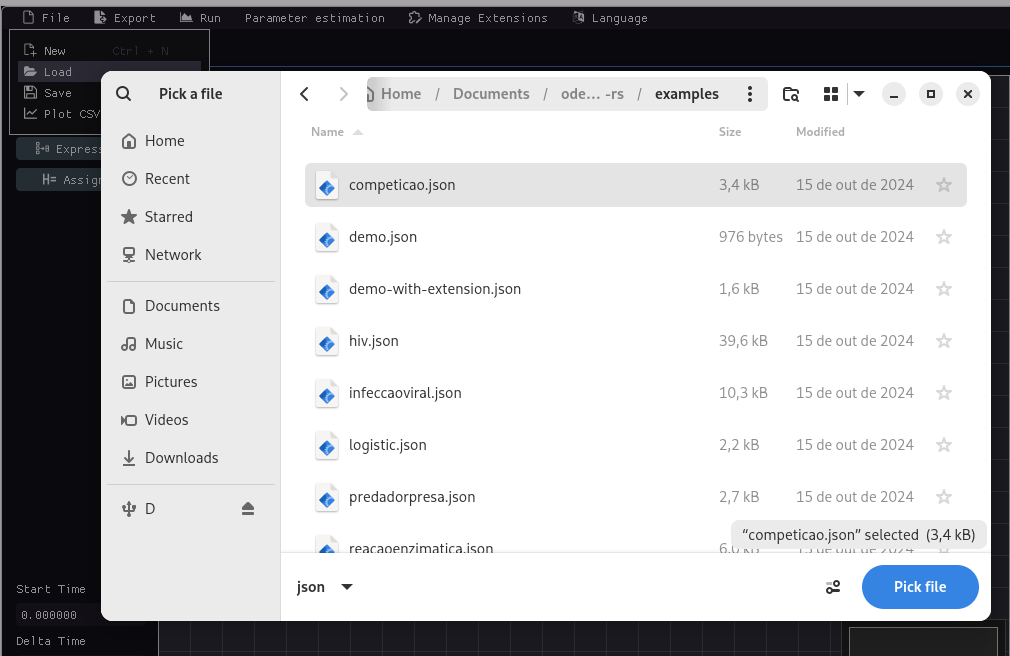
-
This action will open a window that allows you to choose a file and execute it.
- Once this process completes, the model will be loaded in the software, ready for use.